Contour fan upgrade need a step by step please

Turbogus

Active member
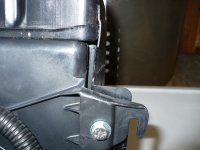
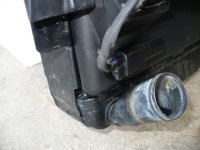
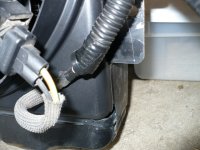
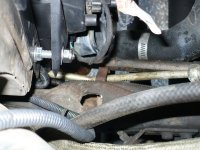
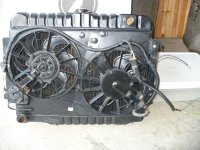
Well, here's what $40 clams bought at the wrecking yard, it was already pulled laying in the trunk of a Merc Mystique I could only match by photos from other forums and I'm hoping that I'm not barking up the wrong tree;

7705699734_a07f1cf0c0_c-1.jpg


7705691762_c8ccfd413b_c-1.jpg


7705686204_2c1b9e8a86_c-1.jpg


7705679706_fd2987dbdc_c-1.jpg


7705674396_9e363ca231_c-1.jpg


The Merc this was laying in had the emission stickers missing as the entire front clip was gone so I'm hoping this is the correct unit, I'm just not certain. It's the only one available within 50 miles of this consumer desert.
Thanks and a lift of the lynch lid for any responses.
 

Yep, that electric fan set up will work just fine. You just need to design a mounting system for it. Run the power thru a relay, preferably a switched relay so that you can manually shut it off when not needed. cause it will come on and drain your battery even when the Jeep is not running.(downfall of an electric fan).

Oh, and by the way, there is no such thing as a former Marine...once a Marine, always a Marine...Semper Fi.
 
:) Semper Fi Marine, I've found a couple of wiring diagrams that may wor with the current setup I have on my Flex a lite fan.
I'm looking at dual relays and dual adustable senders to have the fans come on staggered, also going to incorporate soft start and overrides for redundant "off" and for "on". A little complicated but I'm hoping I can build this on my bench and test it before installing it so if a commie gremlin gets in there I can chase him with a hammer and out of my garage.
 

Well,I finally pulled the radiator out (good thing I did, one of the mounting flanges was loose) and after removing the stock fan shroud with the small 18" Flex a lite fan I set the Merc Mystique assembly inbetween the tanks and all I had to trim was the top mounting tab.
wol_error-1.gif

This image has been resized. Click this bar to view the full image.
8632138314_f015197ef0_c-1.jpg


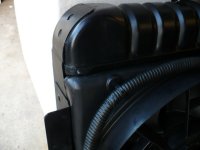
The fitment was very tight but after hitting the edges with my trusty Milwaukee Heat Gun the stress on the tanks was relieved. I was glad to see that the Merc shroud completely covers the radiator core as I've noticed on some posts there's a 3" gap at the bottom.
8641968425_382c6b1147_h.jpg


8641968141_cf34415711_z.jpg

8643067548_7c5f0c8953_z.jpg


8643067226_31070bcbd2_z.jpg


8641967333_c1f9804ed0_z.jpg


Then drilled some pilot holes through the shroud and the radiator flanges;

8636738903_7b6cc6655c_z-1.jpg


8636738931_b59be72737_z-1.jpg


Then ran 1/4" stainless bolts, washers and poly lock nuts;

8636738849_861f8cba48_z-1.jpg


It really went together so easily and well, I no longer have any doubt that this is a viable alternative to more expensive setups.

Next going to set the works into the engine compartment and check clearances.

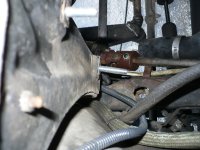
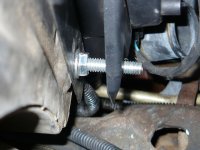
Edit: Test fit went fine, except my overflow bottle spilled coolant on the floor while I was under it, momentary panic until I detirmined what was the cause. Much more room in front of the water pump pulley than the previous fan assy. Only mod for mounting up is I made a longer stud for the radiator mount in the nacelle in the bottom left, this'll allow me to mount the radiator and the shroud with the same stud, given it's location, there was no other way to go.

Edit: Done! mounting the radiator/shroud over the longer stud would've went easier, if I hadn't lost my stubby 1/2 inch combination wrench, my Crescent 1/2 inch gear wrench, and my damn deep well 1/2 inch socket! All I had left was a shallow 12 point socket, a long 1/2 inch combination wrench and my pudgy fingers. Finally got it on, but you can bet I'm going tool shopping this weekend!
8643066370_2fe9cf3b7c_b.jpg


8643065792_f46afaff4d_z.jpg

8643065534_dc55814429_z.jpg

One dramatic difference I've noticed already with the Mystique/Contour fan shroud compared to the setup that was on my Jeep, using the stock AMC fan shroud with the P.O.'s 17" Hayden electric fan is the fan tips didn't reach the opening of the shroud, rendering it inefficient.
 
Last edited:
Today is the first real speed test, mindful that the ambient air temperature was only 71* going to work (11 miles) and BB made it up to 180* steady. This afternoon's going to get into the 80's so testing will resume. Yesterday at idle I did a full test and low speed seems to come on at 150* and the mechanical gauge will hold steady at 160*. I shut off the fans at the in cab override switch and let the temp rise to 200* and then cut in the auto switch to the fans, they came on instantly and brought the motor temp down to 160* within 5 minutes. I'm hoping this'll be the end of my cooling issues I've posted about for the last 3 or so years.
 
I have to say that your project went together real nicely ! I must say I appreciate the work you've done . Was wondering if you think that the studs that hold the fan on to the radiator brackets would need nuts behind the fan brackets to lock up the mounting nuts against , but I see that the project was in the test fit stage as the lower hose was not installed in the last picture so I guess that was for clarity only for the photo . I do commend you on your engineering. Fine job sir ! I'm certain all is working well .
 

Thanks Greg, although this wasn't my own engineering, rather, have been studying the write ups of others' over the past year and I'm really happy with the results. To those whom mentored me during this process, a lift of my lynch lid to you.:beer:
 
:beer:Your welcome sir ! I raise a glass to your accomplishments ! Thank you for your sharing your project with us as we will certainly benefit from your hard work and R & D !
 
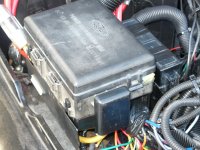
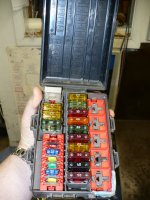
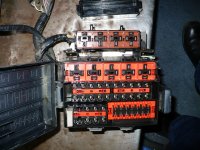
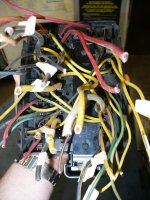
Here's that Ford PDB mounted up, it help me clean up my electrics;

9399619919_38e2accdc6_b.jpg

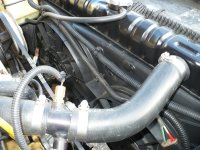
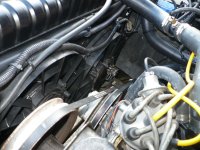
...and the fans fit snug and tight without any clearance issues;

9399620367_86423cdcb6_b.jpg
9402383686_fe57f1e6e6_b.jpg

...although I may revisit this setup at some point in the futrure I'm really happy overall.
 

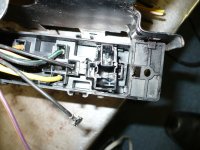
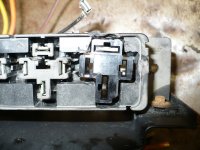
In the true spirit of core , IMPROVISE , ADAPT & OVERCOME ! Not many people I know will replant a PDC , I should do it for the most of rediculous reasons , I accidentally busted a tiny plastic lock that holds a terminal connector in place for a relay when I was temporarily trying to jump terminal 87 on the a/c relay with a radio shack blade type fuse jumper and snapped it . If the relay is pulled , you must disassemble the PDC to reach the bottom to plug the terminal back in . Tiresome , granted. Will have to make it a project , but for now , a new relay and so far good electrical repair on my behalf , no thanks to the so called "professional " who repaired it for my dad when he owned my '92 jeep , is working satisfactory. That job I did could take a thread in explanation and possibly be interesting but I will save it for another day . :drunk:
 
On the large PDB I had snapped off two retainer tabs the hold the terminals in place. Used some downright stinky epoxy blend to fuse 'em in place. Devcon two part Epoxy. This same epoxy I used to incorporate that 70 amp B3 relay socket into the stubby PDB. This stuff is RANK but it holds fast and can only be removed with a Dremel tool and a grinder attachment.

8749425572_720edb19a3_b.jpg

8476783380_1401211aee_b.jpg

8476783718_6fcf224041_b.jpg

8476782754_2f824b5e7f_b.jpg
 
Last edited:
I have contemplated different methods to fix the problem such as a tiny screw in place of the tiny molded plastic pin I snapped but would be next to impossible to work one in place . Yes , have thought of rigging a plastic block fashioned with a screw to hold terminal and epoxied in place but stopped short of doing so for fear terminal would be difficult to remove if the far remote ( just my luck though ) possible exists and must do so. So procrastination reared its head and to date , the afore method of relay removal must still be employed if relay replacement is deemed necessary.
Fortunately , never had a relay go bad but replaced it three years ago when I serviced the a/c and repaired electrical issue under dash just for safety and still good to date. But me being the type who just can't leave well enough alone and has to be perfect about things that potentially will urk me , I still think about it anytime I visit a salvage yard . Who knows , I may just get adventurous and pull it off , but will need a day when feeling up to the challenge of concentration and my presence is not needed anywhere else in the world. Until then , I'll kick it around and maybe just stink glue it in anyway . If I decide to accept this mission , it would be only right to post it . Well , you got me thinking ............
 

On the large PDB I had snapped off two retainer tabs the hold the terminals in place. Used some downright stinky epoxy blend to fuse 'em in place. This same epoxy I used to incorporate that 70 amp B3 relay socket into the stubby PDB. This stuff is RANK but it holds fast and can only be removed with a Dremel tool and a grinder attachment.

<img src="http://www.jeepz.com/forum/attachment.php?attachmentid=17513"/>

<img src="http://www.jeepz.com/forum/attachment.php?attachmentid=17514"/>

<img src="http://www.jeepz.com/forum/attachment.php?attachmentid=17515"/>

<img src="http://www.jeepz.com/forum/attachment.php?attachmentid=17516"/>

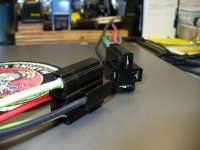
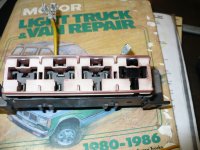
Your photos gave me an idea . Using a relay socket like the pictured ones , I can Drexel cut enough room to epoxy in a new socket and reuse the existing wiring in the new sockets . Will have to measure carefully , but will consider this on top of my other less than honored by me ideas . Will save me from total disassembly of PDC and just make it easier . Thinking again.........
 
Last edited:
I edited the post above that stuff is Devcon two part epoxy, they make a few variations of it but I stand by that stuff for it's toughness.....and it's stink!

If/when it comes down to it, I found the Ford PBC's from mid 90's trucks are easy to disassemble;

8728964930_5937687ea8_b.jpg


8468116857_1ca744c138_b.jpg8728964750_8f347b8658_b.jpg
 
Last edited:
Well it seems I've got my mission . It'll be tough , it'll stink , but I'm just the guy to do it. Where have you heard that before ! In the words of a childhood mentor whom I gained some of my early wisdom from ; Finnious j. Whoopy , your the greatest ! Tennessee tuxedo will not fail !
Now all I have to do is get started . Hope this will work ! Thanks again Turbo Gus ! Greg
 
Glad I could provide some inspiration. Although I'm far from an electircal guru, I've been mentored by some kindly folks here and at another forum;

BASIC WIRING 101, Getting You Started! - JeepForum.com

Thanks again . I'm far from one myself not having a perfect understanding for electrical theory either but can tackle auto wiring with a computer safe test light well enough to diagnose and handle a soldering iron ok for repairs . Thanks for the tutorial and the education is priceless ! Thank ! Greg

P.S. - I've actually stumbled on this post in my travels but have now bookmarked it for future reference . Thank you !
 
"handle a soldering iron" man, if there's one benefit above all that this project gave me it was freehand wire soldering skills with my gun (I gave up on irons long ago).
 

Going to have to try my hand at that since I know exactly what you mean by soldering irons and giving up on them. Yes , either a better iron or a better way . Freehand sounds like a new venture I must gain . Thanks .
 
Back
Top